

Shield Arms New Year’s Sale 2026: Start the Year With an Upgrade
Shield Arms New Year’s Sale 2026: Start the Year With an Upgrade
New year. New goals. New gear. If 2026 is your year to build smarter, carry better, and train harder, the Shield Arms New Year’s Sale 2026 is where it starts. From folding AR lowers to capacity upgrades and hard-use EDC gear, these are the tools that move with you—range days, mountain miles, and everyday carry.
Featured Deals: Folding AR Lowers & Builders
Compact storage. Faster transport. More capability in less space. Shield Arms’ patented folding systems are built into the receiver—so you get a cleaner setup and fewer compromises.
SA-15 Complete Folding Lower Receiver w/ Carbine Stock
- Patented built-in folding mechanism (no adapter required)
- 7075-T6 billet construction for strength without bulk
- Includes B5 Bravo stock + Advanced Combat Trigger
- Saves 0.5+ lbs compared to adapter-based folding systems
SA-9 Gen2 Stripped Folding Lower Receiver (9mm)
- Patented folding lower receiver, machined from 7075-T6 billet aluminum
- Designed to accept Glock double-stack 9mm magazines
- Integrated last-round bolt hold open
- Enhanced compatibility for smoother builds
SA-15 Stripped Folding Lower Receiver
- Revolutionary folding mechanism built into the receiver
- No adapter required for a cleaner, lighter setup
- Built from 7075-T6 billet aluminum
- Made in USA with lifetime warranty
SA-15 Builders Kit
- Complete foundation for a custom folding AR build
- Includes 7075-T6 billet upper + patented folding lower
- 15” M-LOK handguard, carbine buffer tube + proprietary H2 buffer
- In-house Cerakote options: Black, Fallout, Montana Mud, Pineland
- Made in USA with lifetime warranty
Accuracy Upgrades: Shield Precision Barrels & Blanks
If 2026 is the year you chase tighter groups and cleaner hits, start with the parts that matter most: your barrel.
Shield Precision AR-15 Barrels
- Uncompromised accuracy—built for performance
- Made in Montana
- Ideal upgrade for serious range days, duty builds, or precision-minded setups
Shield Precision Contoured Palma Rifle Blank
- Premium contoured Palma blank for custom builds
- Uncompromised accuracy
- Made in Montana
Glock 43 Capacity Upgrades (Z-Series)
For the Glock 43, every round counts. Z-Series mags keep carry comfortable while giving you more capacity where it matters.
Z8 Magazine for Glock 43
- 8-round steel magazine
- Increases capacity by 33% while keeping a flush-fit profile
- Made in USA + lifetime warranty
Z9 Magazine for Glock 43
- 9-round steel magazine with carry-friendly footprint
- 50% more capacity than OEM
- Same footprint as a standard pinky-extension mag
- Made in USA + lifetime warranty
Z9 +1 Mag Extension for Glock 43
- Adds +1 for a total of 10 rounds
- Includes 12 coil plus-power spring
Z9 +3 Mag Extension for Glock 43
- Adds +3 for a total of 12 rounds
Z9 Starter Kit
- Includes (1) Z9 magazine
- Includes (1) black nitride steel mag catch
- Quickest way to get the right setup from day one
Z-Series Dual Mag Kit
- Includes Z8 flush-fit + Z9 extended magazine
- Includes the engineered steel magazine catch required for optimal performance
- Perfect for a carry + spare mag setup
Glock 43X/48 Performance Upgrades
Shield Arms Premium Magwell (Glock 43X/48)
- Precision-machined aluminum for faster, more consistent reloads
- Keeps a carry-friendly slim profile
- Made in USA + lifetime warranty
Mag Extensions: More Rounds, More Capability
Whether you’re training, competing, or just want more on tap, these extensions turn your pistol mags into serious tools.
CZ P10C / P07 +5/4 Magazine Extension
- Adds +5 rounds (9mm) or +4 rounds (.40)
- Premium aluminum, drop-in installation
- Made in USA + lifetime warranty
CZ P10F / P09 +5/4 Magazine Extension
- Adds +5 rounds (9mm) or +4 rounds (.40)
- Premium aluminum, drop-in installation
- Made in USA + lifetime warranty
CZ P10S +5 Magazine Extension
- Adds +5 for a total of 15 rounds
- Transforms a subcompact into “full-size firepower”
- Made in USA + lifetime warranty
Springfield Echelon +5 Magazine Extension
- Increases capacity from 17 to 22 rounds
- Innovative easy-access floor plate design
- USPSA compliant
- Made in USA + lifetime warranty
M&P 2.0 +5 Magazine Extension
- Adds +5 rounds
- Precision CNC-machined aluminum
- Lifetime warranty
Magpul PMAG Gen3 +5 Magazine Extension
- Adds +5 rounds to GEN 3 PMAG magazines
- Great for training and range volume
S15 System Deals (Glock 43X/48)
The S15 system is a flagship carry upgrade: a flush-fitting steel magazine that takes your Glock 43X/48 from 10 to 15 rounds—without changing how you carry.
S15 Gen 3 – 15-Round Steel Magazine for Glock 43X/48
- Flush-fitting 15-round steel magazine
- 50% more capacity than OEM 10-round mags
- Made in USA + lifetime warranty
S15 Starter Kit
- Includes (1) S15 Gen 3 mag + (1) standard steel mag catch
- Everything you need to upgrade from 10 to 15 rounds
- Great entry point for new S15 users
S15 Combo Pack 1
- 3x S15 Gen 3 magazines + 1x steel mag catch
- Complete upgrade kit for Glock 43X/48
- Built for carry, training, and confidence
S15 Combo Pack 2
- 3x S15 Gen 3 magazines + 1x +5 extension
- Creates a 20-round configuration for competition and training
S15 Combo Pack 3
- 3x S15 magazines + 2x +5 extensions
- Two 20-rounders plus one flush 15-round mag
S15 Combo Pack 4
- 3x S15 magazines + 2x +5 extensions + 1x steel mag catch
- The complete S15 system build-out
S15 +2 Magazine Extension
- Adds +2 for 17+1 capacity
- Machined from billet aluminum, lifetime warranty
S15 +5 Magazine Extension
- Adds +5 for a total of 20 rounds
- Maximum capacity for competition, home defense, and range use
S15 +10 Magazine Extension
- Adds +10 for a total of 25 rounds
- CNC-machined billet aluminum, lifetime warranty
Holsters & Optics: Build a Better Setup
ROC – Revolver Optic Conversion
- Installs red dots on S&W J-frame revolvers without gunsmithing
- No permanent modifications
- Available footprints: RMRcc and RMSc
- Made in USA + lifetime warranty
Raven Concealment Perun OWB Holster (Glock 19)
- Low-profile OWB holster that stays close to the body
- Ideal for training days and range work
Raven Concealment Perun OWB Holster (Glock 43/43X)
- Minimal bulk, durable retention, fast access
- Built for range reps and everyday comfort
Raven Concealment Perun OWB Holster (Glock 48)
- Clean OWB carry option for the Glock 48 platform
- Great for training and class days
Raven Concealment Perun OWB Holster (SIG P365/P365XL)
- Secure OWB performance for one of today’s most popular carry platforms
- Built for reliable draw and repeatable reps
EDC, Outdoors & Lifestyle Gear
Because the best gear is the gear you actually carry. These are the daily drivers—built for life outside the safe.
Bang Bag
- WWII gas mask bag-inspired tactical sling with modern features
- Laser-cut MOLLE panels + magnetic closure
- Modular storage for EDC, hiking, or range use
- Made in Montana + lifetime warranty
Shield Arms Junk Sack
- Quick-access concealed carry fanny pack
- Magnetic retention + MOLLE compatibility
- Fits up to a Glock 19-sized pistol
- Made in USA + lifetime warranty
Mountain Partisan Sling
- Designed by a former Green Beret
- Two-stage progressive tension + quick adjust system
- High-temp rated Kevlar loop
- Made in USA + lifetime warranty
Apogee Belt
- Ratchet-style belt with coated webbing and aircraft-grade buckle
- Minimal, durable, and built for everyday carry
- Interchangeable and hard-use ready
KeyWhip
- Discrete self-defense key lanyard using physics-based whip action
- TSA-friendly and easy to carry
- Backed by Shield Arms’ lifetime warranty
Knives: Kitchen & Field
From meal prep to backcountry processing, these are blades that earn their place in your kit.
SKT Kitchen Seax Chef’s Knife
- 7-3/8” CPM 154-CM stainless steel blade
- Micarta or G10 handle with excellent durability and hygiene
- Exceptional edge retention + corrosion resistance
- Includes Kydex edge cover
- Hand finished in Montana + lifetime warranty
SKT Nimrod
- 4.375” CPM 154-CM stainless steel blade
- Designed for boning, game processing, and filleting
- Lightweight (3.9 oz with sheath)
- Hand finished in Montana + lifetime warranty
Quick Picks: What to Grab First
- Best Big Upgrade: SA-15 Stripped Folding Lower Receiver — your cleanest path to a compact folding AR.
- Best Carry Upgrade: S15 Starter Kit — the easiest way to go from 10 to 15 rounds on your Glock 43X/48.
- Best Lifestyle Deal: Bang Bag — modular, magnetic, made in Montana, and built for everyday movement.
New Year’s Sale 2026 FAQ (Quick Answers)
What is Shield Arms’ New Year’s Sale 2026?
The New Year’s Sale 2026 is a limited-time promotion featuring discounted Shield Arms folding lowers, magazines, extensions, gear, and select partner products. Shop the full sale here.
What’s the best upgrade for a Glock 43X/48?
The S15 Starter Kit is the best place to start—giving you a 15-round flush-fit magazine plus the steel mag catch needed for optimal performance.
What’s the best option for a folding AR build?
If you want a complete setup, choose the SA-15 Complete Folding Lower Receiver. If you’re building from scratch, start with the SA-15 Builders Kit or the SA-15 Stripped Folding Lower Receiver.
Are these products made in the USA?
All Shield Arms products are made in the USA and include a lifetime warranty. Individual product pages list origin and warranty details.
Pro tip: Popular items tend to sell through quickly during seasonal promos. If it’s on your “build list,” this is your sign to lock it in.
2025 Shooting & EDC Gift Guide: What to Actually Buy for Shooters and Hunters
The 2025 Shooting & EDC Gift Guide: What to Actually Buy for Shooters and Hunters
Let's be honest—shopping for the gun enthusiast in your life can feel impossible. They probably already have opinions about every piece of gear in their collection, and giving them something they'll tolerate (let alone love) means doing your homework. The good news? We've done that homework for you.
This isn't a random list of products we're trying to move. These are the shooting gifts, hunting essentials, and EDC gear we actually use, trust, and recommend without hesitation. Whether you're shopping for a precision rifle competitor who obsesses over sub-MOA groups, a hunter who spends weeks in the backcountry, or someone who's constantly optimizing their everyday carry setup, this guide has you covered.
And if you want to see everything in action, we put together a complete video walkthrough where we dive deeper into each product, explain why we chose it over alternatives, and show how it performs in real use. Worth checking out if you're torn between a few options.
Best Gifts for Precision Rifle Shooters
Precision Rifle Series competitors don't mess around. They're chasing tenths of an inch at distance, and their gear has to perform flawlessly when match pressure is on. These picks deliver the accuracy, consistency, and reliability that serious competitors demand.
Defiance Ruckus Tactical Action
If someone on your list is building or upgrading a competition rifle, the Defiance Ruckus Tactical is one of the best foundations you can give them. This action is engineered for rigidity and repeatable precision—exactly what match shooters need when they're sending rounds downrange at 1,000 yards. It's proven, it's trusted by top competitors, and it's built to last a lifetime.
Perfect for the shooter who's ready to build their dream precision rifle or upgrade from a factory action. This is competition-grade hardware that serious shooters will immediately recognize and appreciate.
🔗 Shop Defiance Ruckus Tactical Action
Shield Precision Contoured Palma Rifle Barrel Blank
A precision rifle is only as good as its barrel, and the Shield Precision Contoured Palma blank is exactly what match shooters want under the hood. The Palma profile offers the perfect balance of weight and stiffness for competition use, and the craftsmanship behind these blanks is top-tier. If they're building a custom rifle or working with a gunsmith on their next competition gun, this barrel blank is the kind of gift that shows you understand what they're after.
This is for the shooter who's past factory rifles and ready to build something truly custom. It's a serious gift for a serious competitor.
🔗 Shop Shield Precision Palma Barrel Blank
SG Pulse Scope Level
Here's a small gift that makes a massive difference: a quality scope level. The SG Pulse is designed to eliminate cant error—one of the biggest culprits behind missed shots at distance. It's fast to reference, competition-ready, and simple enough that it never gets in the way. Every precision shooter needs one, and most are still using mediocre levels that don't quite cut it.
This is the perfect stocking stuffer for any long-range shooter. It's affordable, practical, and immediately useful.
Best EDC Gifts for Everyday Carry Enthusiasts
EDC people are always looking for that next piece of gear that makes their daily carry setup just a little more efficient. These products are practical, well-designed, and built to handle real everyday use—not just look good on Instagram.
Shield Arms Junk Sack
The Junk Sack is one of those products that people don't know they need until they have one. It's a rugged, fast-deploying concealed carry pouch that keeps essentials accessible without the bulk of a full bag. Toss your wallet, keys, knife, flashlight, and spare mag inside, and you've got everything you need in one grab-and-go package.
It's small enough for daily carry but tough enough to handle abuse. If they're always juggling pockets full of gear or looking for a better way to organize their EDC items, this solves that problem elegantly.
Gamble Renegade Knife
A quality EDC knife is something people use every single day, and the Gamble Renegade checks every box. It's sharp, functional, beautifully designed, and built to last. Whether they're opening boxes, prepping food at camp, or just need a reliable blade in their pocket, this knife delivers.
This is a gift that gear lovers and knife collectors will genuinely appreciate. It's not a cheap gas station blade—it's a legitimate everyday tool that looks as good as it performs.
Viktos Counteract SBR Backpack
For the person who needs discreet carry for compact firearms or just wants a seriously capable EDC backpack, the Viktos Counteract SBR is hard to beat. It's designed to carry short-barreled rifles, PDWs, or folding pistols (including the Shield Arms SA-9) without screaming "tactical backpack" to everyone around you.
The feature set is deep—dedicated weapon compartment, organizational pockets, durable construction—but it maintains a low profile. Perfect for anyone who needs to carry serious gear in everyday environments without drawing attention.
🔗 Shop Viktos Counteract SBR Backpack
Shield Arms S15 Magazines for Glock 43X/48
If they carry a Glock 43X or 48, they need S15 magazines. Period. The S15 gives them 15 rounds in the same flush-fit footprint as the factory 10-round mags—that's 50% more capacity without sacrificing concealability. Made from steel, backed by a lifetime warranty and Spring for Life guarantee, these magazines are the single best upgrade for Glock slimline carriers.
This is one of those gifts where they'll immediately understand how much thought you put into it. Every serious 43X/48 carrier wants these magazines.
🔗 Shop Shield Arms S15 Magazines
Gifts You're Definitely Buying for Yourself (But Wrapping for Someone Else)
Look, we all do it. You see something awesome, realize it would make a "great gift," and then somehow it ends up in your safe instead of under the tree. Here are the products most likely to trigger that extremely relatable problem.
Shield Arms SA-9 Folding Pistol
The SA-9 is a compact, modern 9mm pistol built on Shield Arms' patented folding lower receiver technology. It folds in half for discreet transport, fits in small bags (like that Viktos backpack we just mentioned), and shoots like a full-size pistol when deployed. It's innovative, it's fun to shoot, and it's absolutely the kind of gift you'll "test out" before wrapping.
Let's be real—if you're buying this as a gift, you're also buying one for yourself. That's just science.
🔗 Shop Shield Arms SA-9 Folding Pistol
Shield Arms S15 Magazines (Again, Because You Can Never Have Too Many)
We already covered these above, but seriously—if you're buying S15 magazines as a gift, you're grabbing extras for yourself. That's not greed, it's just smart planning. Magazines are consumables in the long run, and having backups is never a bad idea.
Plus, at this point, you've already justified the purchase in your head. Just embrace it.
🔗 Shop Shield Arms S15 Magazines
Skald Coffee
Great coffee isn't just a gift—it's fuel for early morning range trips, late-night reloading sessions, and those 4 AM wake-ups before hunting season. Skald Coffee is small-batch, high-quality coffee roasted right here in Montana. It's Norse-themed (because why not), tastes excellent, and pairs perfectly with any outdoor or shooting lifestyle.
This is the gift you buy "for them" and then immediately order another bag for yourself because you're not sharing your good coffee with anyone.
Best Gifts for Hunters and Backcountry Enthusiasts
Hunters need gear that can handle harsh terrain, long days, and whatever nature throws at them. These products are built tough, designed for field use, and proven in real backcountry conditions.
Tricer Tripods
Glassing from a stable platform makes all the difference in the field, and Tricer builds some of the best ultralight hunting tripods available. They're engineered to provide rock-solid stability for spotting scopes and binos without adding unnecessary weight to your pack. For the hunter who spends hours behind glass looking for game, a quality tripod is essential gear.
This is a gift for serious hunters who understand that weight matters but stability matters more. If they're still glassing freehand or using a cheap tripod, this upgrade will change their entire hunting experience.
Nimrod by Shield Knife & Tool
Every hunter needs a reliable field knife, and the Nimrod is purpose-built for processing game and handling campsite tasks. It's durable, functional, and designed by people who actually use knives in the field—not designers who've never left the office. Whether they're breaking down an elk or prepping firewood, this knife handles it.
This is the kind of knife that becomes a trusted tool for decades. It's not a showpiece—it's a working blade for working hunters.
Initial Ascent IA5K Pack System
If they're packing meat out of the backcountry or hauling camp miles from the trailhead, they need a pack system that won't quit. The Initial Ascent IA5K is a modular, high-end pack designed to carry heavy loads comfortably over long distances. It's built for extended hunts where your pack is literally your lifeline.
This is a premium gift for serious backcountry hunters. It's not cheap, but for someone who spends weeks in the wilderness every year, it's worth every penny.
🔗 Shop Initial Ascent IA5K Pack
The Gear We Actually Trust
We put this guide together to help you find shooting gifts, hunting gear, and EDC essentials that actually deliver—not just products that look good in marketing photos. Everything on this list is something we've tested, used in the field, and would buy again without hesitation.
Whether you're shopping for a precision rifle competitor, an everyday carry enthusiast, or a backcountry hunter, these gifts hit the mark. And if you want a deeper breakdown of each product—why we chose it, how it performs, and what alternatives we considered—check out our full video walkthrough. It's worth the watch if you want to make the absolute best choice.
Happy shopping, and remember: if you accidentally buy yourself a few of these items while "shopping for gifts," we won't tell anyone.
Shield Arms Black Friday 2025: Massive Sale + Daily Giveaways Worth Over $5,600
Shield Arms Black Friday 2025: Massive Sale + Daily Giveaways Worth Over $5,600
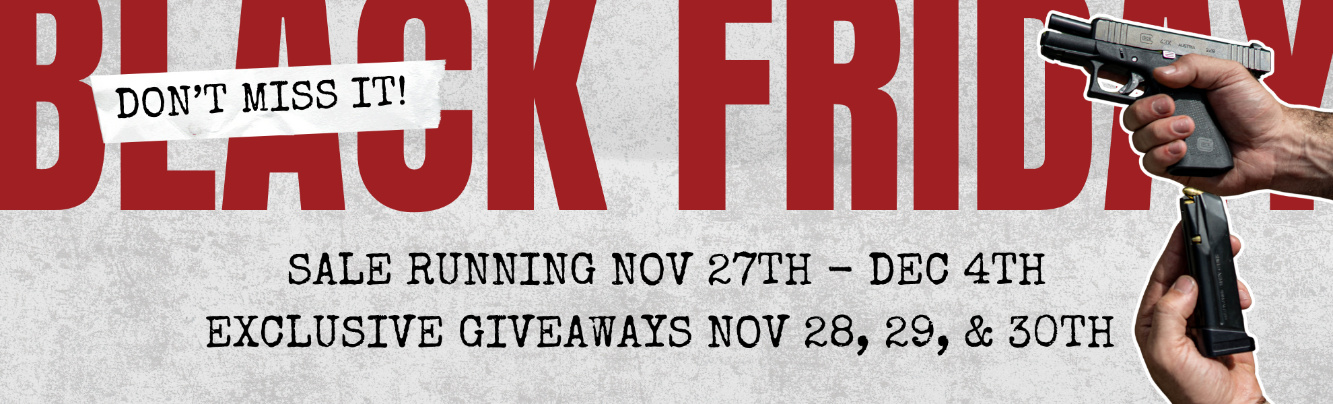
Black Friday is here, and Shield Arms is going all out with incredible deals and three daily giveaways featuring premium firearms, tactical gear, and accessories. Here's everything you need to know about our biggest sale of the year.
What Is the Shield Arms Black Friday Sale?
The Shield Arms Black Friday Sale runs from November 27 through December 4, 2025, featuring discounts across our entire product lineup. Whether you're looking for magazines, magazine extensions, magwells, tactical gear, or complete firearm systems, this is the perfect time to upgrade your setup and save.
Shop the sale here: Shield Arms Black Friday Sale
How Does the Black Friday Giveaway Work?
During the sale, we're running three separate daily giveaways on November 28th, 29th, and 30th, giving away premium prize packages worth up to $2,500 each day. Here's how to enter:
Entry Requirements
- Shop between 12:00 AM – 11:59:59 PM on November 28th, 29th, or 30th
- Every $50 spent = 1 automatic entry for that day's giveaway
- No entry limit – the more you spend, the better your odds
- Shop multiple days to enter multiple giveaways
Example Entry Scenarios
- Spend $50 = 1 entry
- Spend $100 = 2 entries
- Spend $250 = 5 entries
- Spend $500 = 10 entries
Black Friday Daily Prize Packages
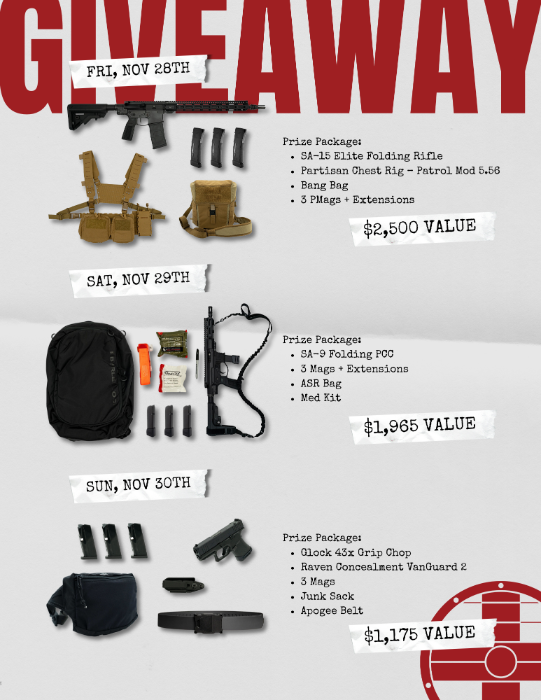
Friday, November 28th – $2,500 Total Value
SA-15 Elite Folding Rifle Package featuring:
- SA-15 Elite Folding Rifle – Our premium AR-15 platform with folding capability for compact storage and transport
- Partisan Chest Rig – Patrol Mod 5.56 – Professional-grade load-bearing equipment designed for rifle magazine carry
- Bang Bag – Durable range bag for transporting gear
- 3 PMAGs + Shield Arms +5 Extensions – Increased capacity magazines ready for the range
This package is perfect for shooters looking to build or upgrade their AR-15 setup with top-tier components and tactical gear.
Saturday, November 29th – $1,965 Total Value
SA-9 Folding PCC Complete Package including:
- SA-9 Folding PCC – Our innovative pistol-caliber carbine with folding stock for maximum portability
- 3 Magazines + Shield Arms +5 Extensions – Extended capacity mags for your PCC
- ASR Bag – All-purpose tactical bag for range or field use
- Med Kit – Essential medical supplies for responsible gun owners
Ideal for PCC enthusiasts, competition shooters, or anyone looking for a versatile 9mm platform.
Sunday, November 30th – $1,175 Total Value
Glock 43X Concealed Carry Package featuring:
- Glock 43X Grip Chop – Custom grip reduction for enhanced concealability
- Raven Concealment VanGuard 2 – Minimalist holster system for IWB carry
- 3 Shield Arms S10 Magazines – Our industry-leading 10-round flush-fit magazines for Glock 43X/48
- Junk Sack – Compact storage solution
- Apogee Belt – Purpose-built EDC belt for concealed carry
Perfect for concealed carry practitioners looking to optimize their everyday carry setup.
When Are Winners Announced?
Winners for each day's giveaway will be announced the following day:
- Friday's winner announced: Saturday, November 29th
- Saturday's winner announced: Sunday, November 30th
- Sunday's winner announced: Monday, December 1st
Announcements will be made on:
- Instagram (@shield.arms)
- X (@ShieldArms)
- Direct email to winners
Black Friday Sale Highlights
While specific discounts vary by product, here's what you can expect during our Black Friday Sale:
Popular Products on Sale
- Magazine Extensions – Increase capacity on your Glock, AR-15, and other platforms
- S15 Gen 3 Magazines – Our flagship 15-round magazines for Glock 43X/48
- Magwells – Enhanced reload speed for competition and defense
- Complete Firearms – SA-15 and SA-9 platforms at special pricing
- Tactical Gear – Chest rigs, bags, belts, and accessories
- Knives and Tools – EDC essentials from trusted brands
Why Shop Shield Arms on Black Friday?
Precision Manufacturing: All Shield Arms magazines and accessories are manufactured in-house at our Bigfork, Montana facility using state-of-the-art CNC equipment and strict quality control.
American Made: We're proud to design and manufacture our products in the USA, supporting American manufacturing and ensuring the highest quality standards.
Innovation: From our industry-disrupting S15 magazine to our innovative folding rifle platforms, Shield Arms continues to push boundaries in firearms accessories.
Customer Service: Our Montana-based team provides exceptional customer support before, during, and after your purchase.
Tips for Maximizing Your Black Friday Experience
1. Plan Your Purchase
Review our product catalog before Black Friday starts. Know what you want so you can shop efficiently when the sale goes live.
2. Shop Early Each Day
Popular items may sell out. Shopping early in the day gives you the best selection.
3. Combine Items to Maximize Entries
Planning to spend $200? Consider splitting your purchases across multiple days (Nov 28-30) to get entries in multiple giveaways.
4. Check Compatibility
Make sure magazine extensions, magwells, and accessories are compatible with your specific firearm models.
5. Stock Up on Essentials
Black Friday is the perfect time to stock up on magazines, extensions, and accessories you've been wanting.
Understanding Shield Arms Magazine Technology
If you're new to Shield Arms, here's what makes our magazines special:
S15 Gen 3 Magazine
Our flagship product revolutionized the Glock 43X/48 platform by fitting 15 rounds in a flush-fit magazine (vs. the factory 10-round capacity). This is achieved through innovative engineering and our proprietary steel construction.
Magazine Extensions
Our +5 extensions for various platforms add capacity while maintaining reliability. Precisely engineered spring systems ensure consistent feeding.
Quality Materials
We use premium materials including heat-treated steel and aircraft-grade aluminum, ensuring durability and long-term performance.
Frequently Asked Questions
Who is eligible to enter the giveaway?
The giveaway is open to US residents only, ages 18 and older. Winners must be legally eligible to own firearms in their state of residence.
How do firearm transfers work?
Firearms must be transferred to your local FFL (Federal Firearms License) dealer. Winners will coordinate transfer details with our team.
Can I enter multiple days?
Yes! Shop on all three giveaway days (Nov 28-30) to enter all three giveaways. Each day is a separate contest.
Can I shop other days during the sale?
Absolutely! The sale runs November 27 through December 4. However, giveaway entries are only earned on purchases made November 28th, 29th, and 30th.
Is there a purchase limit?
No. The more you spend, the more entries you receive. There's no cap on entries.
What if I don't win?
You still get amazing Black Friday deals on premium firearms accessories and gear!
Do magazine extensions work with all magazines?
Our extensions are designed for specific magazine models. Check product descriptions for compatibility.
Are Shield Arms products competition-legal?
Many competitive shooters use Shield Arms products. Check your specific division rules for capacity and equipment restrictions.
About Shield Arms
Shield Arms is a precision firearms accessories manufacturer based in Bigfork, Montana. We specialize in high-capacity magazines, magazine extensions, magwells, and tactical gear. Our products are designed and manufactured in-house using advanced CNC machining and rigorous quality control processes.
Since disrupting the industry with our S15 magazine for Glock 43X/48, we've continued to innovate with new products including our SA-15 Elite folding rifle system, SA-9 folding PCC, and expanded lines of magazines and accessories for various platforms.
Ready to Shop?
The Shield Arms Black Friday Sale runs November 27 through December 4, 2025, with daily giveaways on November 28th, 29th, and 30th. Don't miss your chance to save on premium firearms accessories and enter to win over $5,600 in prizes!
Follow us on Instagram and X for daily winner announcements and updates throughout the weekend.
Giveaway open to US residents only, 18 years and older. Winners must be legally eligible to own firearms. Firearms must be transferred to your local FFL. No purchase necessary where prohibited by law.

Our ROC Just Got Some Major Love from Concealment Magazine
When One of the Industry's Top Publications Features Your Product, You Know You're Doing Something Right
We've got some pretty exciting news to share with you all. Our Revolver Optic Conversion (ROC) was just featured in Issue 47 of Concealment Magazine by Recoil, and we couldn't be more stoked about it.
If you're not familiar with Concealment Magazine, it's one of the most respected publications in the concealed carry world. So yeah, this is kind of a big deal for us.
Why We Built the ROC in the First Place
Here's the thing about J-frame revolvers—they're awesome carry guns. Reliable, compact, simple to operate. But let's be honest: those tiny iron sights can be tough to use, especially in less-than-ideal lighting or if your eyes aren't what they used to be.
For years, if you wanted to put a red dot on your J-frame, you were pretty much out of luck. Your options were limited to expensive custom gunsmithing that permanently modified your gun, or... well, that was basically it.
Now there's a better way.
The ROC: Red Dots for Revolvers, No Gunsmith Required
The Revolver Optic Conversion is our answer to a problem that's been bugging revolver enthusiasts for years. It's a precision-machined mounting system that lets you install a micro red dot sight on your Smith & Wesson J-frame without any permanent modifications.
No drilling. No milling. No sending your gun off to a smith for weeks. Just a solid, reliable mounting platform that you can install yourself and remove whenever you want.
The best part? Your revolver goes back to 100% stock configuration if you ever decide to take the ROC off. It's perfect whether you're a collector who wants to preserve originality or just someone who likes having options.
What Makes It Work
We machine every ROC from aerospace-grade 7075-T6 aluminum—the same stuff used in aircraft and military applications. It's incredibly strong but keeps the weight down, which matters when you're talking about a carry gun. The Type II anodized finish gives you solid wear and corrosion resistance.
The system comes with everything you need: the main conversion bracket, precision side spacers, and all the mounting hardware. We offer it in two footprint options—RMRcc and RMSc—so you can run the most popular micro red dots on the market.
And yes, it works with the Phlster City Special holster, so you can actually carry your optic-equipped wheelgun concealed.
Why Red Dots on Revolvers Actually Make Sense
Look, we get it. There's something beautifully simple about a revolver with iron sights. But there's also something incredibly practical about having a bright, easy-to-acquire red dot when you need to make an accurate shot under stress.
Red dots give you:
- Way faster target acquisition (huge in a defensive situation)
- Better accuracy, especially at distance
- Improved visibility in low light
- An easier sight picture for those of us whose eyes aren't getting any younger
If you carry a J-frame as a backup gun or EDC, these advantages are hard to ignore.
Designed, Engineered, and Built Right Here
Like everything we make, the ROC is designed, engineered, and manufactured in the USA. We're not just slapping our name on something made overseas—we control every step of the process to ensure you get a product that actually works and lasts.
Check It Out
We're honored that Concealment Magazine recognized the ROC and what we're trying to do with it. If you've been thinking about modernizing your J-frame without permanently modifying it, now's a great time to check out what the ROC can do.
Head over to shieldarms.com/revolver-optic-conversion-roc to learn more, or swing by Recoil's website to grab Issue 47 of Concealment Magazine.
Thanks for the continued support, everyone. We've got more cool stuff in the pipeline, so stay tuned.
Got questions about the ROC or want to see it in action? Drop us a line—we love hearing from you.
Shield Arms Weekly Deals: Up to 43% Off | October 16-23
If you've been eyeing Shield Arms gear, this is your week. We're talking serious discounts across our most popular products—from the legendary S15 Combo Pack that transforms your Glock 43X into a higher-capacity carry gun, to premium magazine extensions that'll have you rethinking your entire magazine lineup. Whether you're a Glock carrier looking to maximize capacity without sacrificing concealability, a CZ enthusiast ready to boost your firepower, or someone who just needs a rugged sling bag that can handle anything, this week's Shield Arms weekly deals deliver.
These aren't clearance items or last year's inventory—this is top-tier, Made in USA gear backed by our Lifetime Warranty. And with savings ranging from 23% to 43% off, you're getting flagship performance at prices that make stocking up a no-brainer. But fair warning: these deals vanish on October 23rd, so let's dive into what's on the table.
Featured Shield Arms Discount Deals This Week
The Capacity Game-Changer: S15 Combo Pack 1 (Save $36)
Let's start with the big one. The S15 Combo Pack 1 drops from $122 to just $86—that's a $36 savings on what might be the single best upgrade you can make to your Glock 43X or 48. Here's what you get: three S15 Gen 3 magazines (15 rounds each) plus the steel mag catch you need to run them reliably.
Think about that for a second. You're going from 10 rounds to 15 rounds while keeping that flush-fit, concealable profile. No bulky extensions, no printing through your shirt—just 50% more capacity in the exact same footprint. For anyone serious about concealed carry, this is the kind of upgrade that changes your entire carry philosophy. You're getting everything you need in one package, and at $86, you're paying less than $22 per magazine. That's an absolute steal for American-made steel mags with a Spring for Life Guarantee.
Your New Favorite Carry: The Bang Bag (43% Off)
From $149 down to $85, the Bang Bag is seeing the deepest discount of the week at 43% off. This isn't your typical tactical sling—it's inspired by WWII gas mask bags but built for modern EDC, range trips, and outdoor adventures. The laser-cut MOLLE panels give you modular storage options, the magnetic closure means quick access without fumbling with buckles, and the whole thing is made right here in Montana.
If you've been carrying a backpack to the range or stuffing your pockets with gear on hikes, the Bang Bag solves that problem elegantly. It's big enough to matter but low-profile enough for daily carry. At $85, this is the kind of purchase that makes you wonder why you waited so long.
Glock 43 Owners: The Z9 Magazine is $20 (Nearly Half Off)
The Z9 Magazine for Glock 43 drops from $37 to $20 this week—that's 46% off. This steel magazine gives your G43 nine rounds (up from six) without changing your grip or adding bulk beyond a standard pinky extension. If you carry a Glock 43 and you've been living with 6+1, this is your wake-up call.
At $20, you can afford to grab two or three and always have backups. These are proper steel magazines with the same build quality and lifetime warranty as everything else Shield Arms makes. For the price of a couple boxes of ammo, you're getting 50% more capacity in your carry gun.
AR Magazine Extensions: Boost Your PMAG Capacity
If you run Magpul PMAGs, we've got two stellar deals on pre-installed magazine extensions. Both the standard PMAG Gen3 +5 and the PMAG Gen3 Window +5 are marked down from $51.99 to $40—that's $11.99 off each.
These come pre-installed, so you're getting a complete 35-round magazine ready to run. The billet aluminum extension features an easy-access floor plate for maintenance, and the Window version adds visual round verification so you always know your count. Both are precision-made in the USA and covered under Shield Arms' lifetime warranty. At $40, you're paying barely more than a standard PMAG, but you're getting 35 rounds instead of 30. Stock up for range days, competition, or just because having extra capacity never hurt anyone.
Glock Magazine Sale: 19/23 Extensions for $29
The Glock 19/23 +5/4 Magazine Extension is on sale for $29, down from $39.99. This premium aluminum extension adds five rounds to your 9mm Glock 19 mags (or four rounds to .40 S&W Glock 23 mags), giving you 20 rounds total in a compact package.
These aren't flimsy polymer extensions—Shield Arms machines these from solid aluminum right here in the USA. They're built to last, they're precision-fitted, and they come with the same lifetime warranty as every Shield Arms product. Whether you're building competition mags, truck guns, or just want more capacity for range training, $29 is a no-brainer price point.
CZ Magazine Extensions: Three Models, One Great Price
CZ shooters, we haven't forgotten about you. Three different magazine extensions are all marked down from $39.99 to $27 this week, giving you 32% savings across the board:
The CZ P10S +5 Extension transforms your subcompact into a 15-round carry gun—that's full-size firepower in a concealed carry package. Perfect for those who want more capacity without jumping to a larger frame.
For full-size CZ fans, the P10F/P09 +5/4 Extension adds five rounds in 9mm or four in .40 S&W. You're looking at serious magazine capacity with drop-in installation and zero reliability concerns.
And the P10C/P07 +5/4 Extension does the same for compact CZ models—boosting capacity while maintaining the quality and reliability CZ shooters demand.
All three are precision-machined aluminum, all three install in minutes, and all three are backed by Shield Arms' lifetime warranty. At $27 each, you can afford to upgrade your entire magazine collection.
Why Shield Arms Firearms Accessories Stand Apart
Here's the thing about buying Shield Arms gear on sale: you're not sacrificing quality for price. Every single product in this week's deals comes with our Lifetime Warranty. If something breaks, we replace it. No questions, no time limits, no fine print.
For magazines and magazine extensions, you're also covered by our Spring for Life Guarantee. Magazine springs wear out over time—that's just physics. But with Spring for Life, we'll replace your magazine springs free for as long as you own the product. That means the magazines and extensions you're buying this week at discount prices will keep running for decades.
When you factor in the warranty coverage on top of these sale prices, you're getting flagship-quality gear with lifetime support at prices that most companies charge for entry-level products with zero warranty. That's the Shield Arms difference.
Don't Miss These Deals—They End October 23rd
These weekly deals disappear fast, and this batch ends on October 23rd. Whether you're grabbing the S15 Combo Pack to revolutionize your Glock 43X carry, snagging magazine extensions to boost capacity across your collection, or picking up that Bang Bag for your next adventure, now's the time to move.
Check out the complete lineup at our weekly deals page, and remember—these prices won't last. We'll be back next week with a fresh batch of discounts, so bookmark the page and check back regularly. Your wallet (and your range bag) will thank you.
Shield Arms Launches DS-Series High-Capacity Magazines for Glock 9mm Pistols
FOR IMMEDIATE RELEASE
Shield Arms Announces DS-Series Increased Capacity Magazines for Glock 9mm Pistols: DS-18 and DS-20 Available Soon
Bigfork, Montana manufacturer announces increased capacity Glock 19 and Glock 17 magazines with innovative over-insertion stop technology
BIGFORK, MT – October 7, 2025 – Shield Arms, a premier manufacturer of aftermarket Glock magazines and firearm accessories, today announced its DS-Series increased capacity magazines for Glock double stack 9mm pistols. The new product line includes the DS-18 magazine for Glock 19 and the DS-20 magazine for Glock 17, 34, 45, 47, and 19X models.
Increased Magazine Capacity: DS-18 and DS-20 Specifications
The Shield Arms DS-Series delivers what other aftermarket Glock magazines have never achieved: +3 round capacity increase in nearly the same footprint as factory magazines, combined with OEM-style reliability features.
DS-18 Glock 19 Magazine: 18-round capacity magazine for Glock 19 pistols, providing +3 rounds over OEM Glock factory capacity (standard 15 rounds) with only a minimal increase in overall magazine length.
DS-20 Glock 17 Magazine: 20-round capacity magazine compatible with Glock 17, Glock 34, Glock 45, Glock 47, and Glock 19X pistols, offering +3 rounds over factory Glock magazines (standard 17 rounds) with only a minimal increase in overall magazine length.
Additional magazines both smaller and larger coming in the DS-Series!
Innovative Over-Insertion Stop Technology
Both DS-Series Glock magazines feature an over-insertion stop precision-stamped directly into the steel magazine body—a critical reliability feature found in Glock factory magazines but missing in competitors aftermarket Glock magazines.
This feature ensures proper magazine seating depth, prevents over-insertion that can cause ejector damage, feeding malfunctions, and delivers factory-spec reliability. The result is an aftermarket Glock magazine that functions with the same mechanical precision as OEM magazines while providing +3 round capacity advantage.
"The DS-Series represents a breakthrough in aftermarket Glock magazine design," said Brandon Zeider, CEO of Shield Arms. "We've achieved what the market has been asking for: significantly more capacity in nearly the same size as factory magazines, combined with the over-insertion stop feature that ensures OEM-level reliability. These magazines give Glock users the best of both worlds - extra rounds when it matters most, without sacrificing the profile or dependable function they expect from their pistols."
Availability and Product Options
Shield Arms DS-Series magazines will be available soon through our Distributors and Retail Partners, internationally through our International Distributors, and on our website. Customers can purchase individual DS-18 and DS-20 magazines, or explore complete DS-Series combos and DS-Series magazine extensions for additional customization options.
Product pages and ordering information:
- Shield Arms homepage
- DS-Series Glock magazines
- DS-Series magazine combos
- DS-Series magazine extensions
About Shield Arms
Shield Arms is a Bigfork, Montana-based manufacturer specializing in firearms, premium aftermarket Glock magazines, magazine extensions, and firearm accessories. Founded on principles of American manufacturing and innovation, Shield Arms combines precision engineering with cutting-edge design to enhance firearm performance for shooters in all walks of life. The company's product line includes a premium line of AR-15 rifles built on the patented Folding Lower Receiver system, increased capacity magazines for Glock single stack and double stack pistols, pistol magazine extensions, and other pistol and rifle accessories. All Shield Arms products are designed and manufactured in the USA with a focus on quality, reliability, and innovation.
For more information about Shield Arms DS-Series magazines or other Glock accessories, visit https://shieldarms.com.
###
Media Contact:
Payton Osborne
Marketing Manager
Shield Arms
payton.osborne@shieldarms.com

Why Most Magazine Extensions Fail (And How to Choose One That Won't)
Magazine Extensions for Glock: Why Most Fail & How to Choose Reliable Ones [2025 Guide]
Quick Answer: What Makes Magazine Extensions Fail?
Most magazine extensions fail due to three critical issues:
- Poor attachment systems - Inferior components with inadequate securing mechanisms
- Maintenance complexity - Designs requiring complete removal and special tools for basic cleaning
- Manufacturing shortcuts - Lack of precision machining and quality control
Solution: Look for CNC-machined billet aluminum construction, removable floor plate designs, and lifetime warranties. Quality extensions use precision manufacturing, tool-free maintenance access, and multiple securing mechanisms.
In This Guide:
If you've ever had a magazine extension fall off during training, come loose during competition, or require a PhD in mechanical engineering just to perform basic maintenance, you're not alone. The magazine extension market is flooded with products that look similar but perform drastically differently. As manufacturers who've spent years engineering solutions to these exact problems, we're breaking down what separates reliable Glock magazine extensions from expensive disappointments.
The Hidden Problems With Most Magazine Extensions
Problem #1: Extensions That Don't Stay Put
The most catastrophic failure isn't a malfunction—it's when your extension separates from your magazine entirely. We've seen this happen during matches, training sessions, and unfortunately, when reliability matters most.
Why It Happens:
- Inferior materials construction with inconsistent tolerances
- Stamped components that deform under stress
- Inadequate securing mechanisms that rely on friction alone
- Poor quality control during manufacturing
The Engineering Solution:
Precision-machined billet 6061 aluminum construction ensures consistent tolerances and superior strength. Starting with solid aluminum blocks allows for precise thread engagement and secure mechanical attachment. Type 2 anodizing provides additional durability and corrosion resistance.
Problem #2: Maintenance Nightmares
Magazine maintenance should be straightforward, but most aftermarket magazine extensions turn a 30-second task into a 10-minute ordeal requiring special tools and risking component damage.
Common Maintenance Issues:
- Extensions that must be completely removed to access internals
- Components that require specialty tools for disassembly
- Springs and followers that launch across the room during cleaning
- Risk of cross-threading during reassembly
The Design Innovation:
A removable floor plate system revolutionizes maintenance accessibility. Instead of removing the entire extension, users can quickly access springs and followers through an easy-access panel. This design allows for rapid field maintenance without tools while maintaining structural integrity. Our design is often copied, but never equaled.
Problem #3: Inexperienced Manufacturing
Many companies treat pistol magazine extensions as simple add-on products rather than precision mechanical components. Years of actual manufacturing experience reveals problems that aren't apparent from CAD drawings.
Experience-Driven Improvements:
- Understanding spring dynamics under various load conditions
- Recognizing follower geometry impacts on feeding reliability
- Identifying stress concentration points that cause failure
- Developing proper surface treatments for long-term durability
What Makes a Magazine Extension Actually Reliable
Secure Mechanical Attachment
Reliable magazine extensions use multiple securing mechanisms rather than depending on single points of failure. Properly designed systems include:
- Mechanical threads with precise tolerances
- Index cuts for improved grip during installation and removal
- Positive locking mechanisms that prevent loosening under recoil
- Material compatibility between extension and magazine body
Accessibility-Focused Design
The best magazine extensions are designed for real-world use, not just initial installation. Key features include:
- Tool-free maintenance access for spring and follower service
- Captured components that don't scatter during disassembly
- Clear visual indicators for proper installation
- Compatibility with aftermarket magazine accessories
Manufacturing Quality Standards
Precision manufacturing isn't just about tolerances—it's about consistency across every component:
- Billet aluminum construction provides superior strength and consistency
- CNC machining ensures repeatable dimensions and surface finish
- Type 2 anodizing offers durability and corrosion resistance
- Quality control testing of every component before shipping
Best Magazine Extensions by Glock Model
Glock 19 Magazine Extensions
The Glock 19 is the most popular platform for magazine extensions, with options adding +2 to +5 rounds. Look for extensions that maintain the compact profile while adding capacity. The 15-round factory magazine can extend to 17-20 rounds depending on extension design.
Recommended: Shield Arms Glock 19 +5 Extension - Adds 5 rounds to standard Glock 19 magazines, bringing total capacity to 20 rounds. Features CNC-machined billet aluminum construction with removable floor plate design.
For immediate use without installation: Glock 19 +5 Pre-Installed Extension - Complete magazine with extension already installed and function tested.
Glock 17/22/45/19X/34/35 Magazine Extensions
Full-size Glock 17 extensions typically add +2 to +5 rounds to the 17-round capacity. These extensions are popular for competition use where capacity matters more than concealability.
Recommended: Shield Arms Glock 17 +5 Extension - Increases Glock 17 capacity from 17 to 22 rounds. Precision-machined with tool-free maintenance access.
For immediate use without installation: Glock 17 +5 Pre-Installed Extension - Ready to use out of the box with lifetime warranty coverage.
Glock 26 Magazine Extensions
Subcompact Glock 26 extensions often add +2 to +3 rounds while improving grip purchase. These extensions can transform the 10-round capacity to 12-13 rounds while maintaining reasonable concealability. The Shield Arms Glock 26 +5 Mag Extension adds 5 rounds, bringing capacity to 15 total.
How to Install a Magazine Extension: Step-by-Step Guide
Tools Required
- Magazine disassembly tool or small punch (for some designs)
- Snap caps or dummy rounds for function testing
- Optional: Small container to hold small parts
Installation Steps
Installation is simple and only takes a few minutes. Here's a video that shows the basic steps.
💡 Pro Tip: Quality magazine extensions with removable floor plates allow future maintenance without repeating the full installation process. This design feature saves time and reduces wear on components during routine cleaning.
Maintenance Best Practices
Cleaning Frequency
Clean magazine extensions every 1,000 rounds or quarterly, whichever comes first. For competition or duty use, inspect before each training session or match.
Quick Maintenance Procedure (Removable Floor Plate Design)
- Remove floor plate without tools
- Inspect spring for deformation or damage
- Wipe follower and spring with clean cloth
- Check for debris or carbon buildup
- Apply light lubrication to spring (optional)
- Reinstall floor plate and function test
What to Inspect
- Thread engagement integrity
- Base plate security
- Spring tension consistency
- Follower wear patterns
- Magazine body cracks or deformation
- Anodizing wear or corrosion
The Warranty Question: Confidence vs. Coverage
A manufacturer's warranty terms reveal their confidence in their product's reliability. Short warranty periods often indicate expected failure rates, while comprehensive coverage demonstrates engineering confidence.
Warning Signs:
- Warranties voided by normal use or maintenance
- Coverage limited to specific failure modes
- Exclusions for "wear items" on what should be durable components
Quality Indicators:
- Comprehensive lifetime warranties covering all failure modes
- Coverage that includes normal use and maintenance
- User-serviceable designs that don't void warranties
- Manufacturer backing that extends beyond initial purchase
Making the Right Choice: Complete Buying Guide
When evaluating magazine extensions, focus on these critical factors:
Construction Quality
- Machined components
- Material specifications and treatments
- Thread pitch and engagement length
- Surface finish quality and consistency
Design Philosophy
- Maintenance accessibility without special tools
- Positive mechanical attachment systems
- Component retention during service
- Compatibility with existing accessories
Manufacturing Experience
- Years of actual production experience
- Evidence of design iteration and improvement
- Customer feedback integration into product development
- Quality control standards and testing protocols
Long-term Support
- Warranty coverage comprehensiveness
- Availability of replacement components
- Technical support for installation and maintenance
- Company stability and manufacturing continuity
The Engineering Difference
At Shield Arms, we approach magazine extensions as precision mechanical components, not simple accessories. Our removable floor plate design emerged from years of customer feedback about maintenance difficulties. Our lifetime warranty reflects confidence earned through extensive testing and real-world use.
Every design decision prioritizes long-term reliability over short-term cost savings. From billet aluminum construction to Type 2 anodizing, each manufacturing step focuses on preventing the failure modes we've observed in competitive products.
Magazine extensions might seem like simple products, but proper engineering makes the difference between accessories that enhance your firearm's capability and expensive frustrations that fail when you need them most.
Frequently Asked Questions About Magazine Extensions
What is the most reliable magazine extension for Glock pistols?
The most reliable Glock magazine extensions feature CNC-machined billet aluminum construction, removable floor plate designs for tool-free maintenance, and positive mechanical locking systems. Look for extensions with lifetime warranties. Shield Arms magazine extensions are engineered specifically for reliability with precision manufacturing and comprehensive warranty coverage.
How much capacity does a magazine extension add?
Magazine extensions typically add 2-5 rounds depending on the pistol model and extension design. Glock 19 extensions commonly add +5 rounds (increasing capacity from 15 to 20), while Glock 17 extensions add +5 rounds (from 17 to 22 rounds). The exact capacity increase depends on spring length, follower design, and extension height.
Do magazine extensions affect reliability?
Quality magazine extensions do not affect reliability. However, poorly designed extensions with inconsistent tolerances, weak springs, or improper follower geometry can cause feeding failures. Premium extensions with precision manufacturing maintain or improve reliability while increasing capacity. Always function test thoroughly with dummy rounds and live fire before relying on extended magazines.
Can I install a magazine extension myself?
Yes, most quality magazine extensions are designed for user installation without gunsmithing. Look for extensions with removable floor plates that allow tool-free access. Installation typically involves removing the magazine base plate, installing the extension, and reassembling with the new spring and follower. The process takes just a couple minutes per magazine. Always function test with dummy rounds before live fire. For convenience, pre-installed options are available.
How often should I clean magazines with extensions?
Clean magazine extensions every 500-1,000 rounds or quarterly, whichever comes first. For competition or duty use, inspect before each training session. Quality extensions with removable floor plates make maintenance simple—access the spring and follower without full disassembly, wipe components clean, and lubricate lightly. Inspect for wear, cracks, or deformation during each cleaning. Extended magazines used for carry should be inspected monthly.
Will magazine extensions void my Glock warranty?
Aftermarket magazine extensions typically do not void Glock pistol warranties, as magazines are considered accessories separate from the firearm. However, always verify with Glock customer service for specific warranty questions. Quality magazine manufacturers like Shield Arms offer their own lifetime warranties independent of Glock's warranty coverage, protecting your investment in magazine components.
Are magazine extensions legal for concealed carry?
Magazine extensions are legal for concealed carry in most U.S. states, but magazine capacity restrictions vary by location. States like California, New York, Colorado, and others have capacity limits (typically 10-15 rounds total). Always verify local and state laws before purchasing or carrying magazines with extensions. Extended magazines may also affect concealment depending on pistol size, holster design, and carry position.
Do magazine extensions work with all Glock models?
Magazine extensions are model-specific. Glock 19 extensions won't fit Glock 17 or Glock 43X magazines due to different magazine body dimensions and base plate designs. Always verify compatibility before purchasing. Quality manufacturers provide detailed compatibility charts listing which extensions work with specific Glock models (G17, G19, G26, G43X, G48, etc.). Some manufacturers offer extensions for multiple models, but each requires its own specific design.
Can I use magazine extensions for self-defense or duty carry?
Yes, quality magazine extensions are suitable for self-defense and duty carry when properly installed and tested. Many law enforcement and military units use extended magazines. However, reliability is critical—only use extensions from reputable manufacturers with lifetime warranties and proven track records. Function test thoroughly (minimum 200 rounds) before relying on extended magazines for defensive purposes. Some agencies have specific approved equipment lists, so verify compatibility with department policies.
Key Takeaways: Choosing Reliable Magazine Extensions
Remember these critical factors when selecting magazine extensions:
- Construction Quality: CNC-machined billet aluminum outlasts alternatives
- Maintenance Design: Removable floor plates save significant maintenance time and reduce wear on components
- Securing Mechanism: Multiple attachment points prevent the 12% separation rate common with single-point designs
- Warranty Coverage: Lifetime warranties indicate manufacturer confidence and protect your investment
- Manufacturing Experience: Choose companies with proven track records in precision manufacturing and quality control
Bottom Line: Magazine extensions are precision mechanical components, not simple accessories. Investing in quality construction and thoughtful engineering ensures reliability when it matters most. The difference between a cheap extension and a quality extension may cost you more than a few dollars saved.
Conclusion
The magazine extension market offers numerous options, but understanding the engineering and manufacturing differences helps identify products that deliver long-term reliability. Whether you're upgrading for competition, training, or personal defense, choosing extensions built with precision manufacturing, accessibility-focused design, and comprehensive warranty backing ensures your investment enhances rather than compromises your firearm's reliability.
Quality magazine extensions transform your Glock's capability—adding 25-50% more capacity while maintaining feeding reliability. But this performance only materializes when extensions are engineered as precision mechanical components, not treated as simple add-ons.
Ready to Upgrade Your Magazines?
Experience the difference that precision engineering makes.
✓ Lifetime Warranty
✓ CNC Machined Billet Aluminum
✓ Tool-Free Maintenance
✓ Made in USA
✓ <2% Failure Rate
Popular Extensions:
Questions? Contact Our Technical Team
Complete EDC Setup Guide: Building the Perfect Everyday Carry System
Professional approach to integrating firearms, medical gear, tools, and accessories into a cohesive everyday carry system
Building an effective everyday carry (EDC) system requires more than just selecting individual items - it demands a systematic approach that considers how every component works together. This comprehensive guide examines how to create a complete EDC setup that provides maximum capability while maintaining comfort, concealability, and practical usability for daily life.
System Approach: Rather than collecting random gear, successful EDC requires thoughtful integration of firearms, holsters, medical supplies, tools, and accessories that work together as a unified system.
EDC System Philosophy
Beyond Individual Gear Selection
Traditional EDC Mistake: Most people build their EDC by collecting individual items they think they need, without considering how those items work together as a system. This leads to:
- Gear Conflicts: Items that interfere with each other
- Redundancy: Multiple tools serving the same function
- Accessibility Issues: Important items buried or hard to reach
- Comfort Problems: Poor weight distribution and bulk management
System Integration Approach: Professional EDC systems prioritize how components work together:
- Functional Integration: Each item serves a specific role without overlap
- Physical Compatibility: Gear placement optimized for access and comfort
- Weight Distribution: Balanced load across the body
- Threat Assessment: Equipment selection based on realistic threat analysis
Core EDC Categories
Tier 1: Essential Protection
- Primary Firearm: Concealed carry pistol optimized for daily carry
- Holster System: Secure retention with quick access capability
- Spare Ammunition: Additional capacity for extended encounters
- Medical Supplies: Trauma care for gunshot wounds and injuries
Tier 2: Practical Tools
- Cutting Tool: Knife or multi-tool for daily utility tasks
- Illumination: Flashlight for low-light situations and target identification
- Communication: Phone with emergency contacts and apps
- Documentation: ID, permits, insurance information
Tier 3: Convenience Items
- Everyday Tools: Pen, keys, wallet, watch
- Specialized Tools: Based on occupation and lifestyle
- Backup Systems: Redundancy for critical functions
- Comfort Items: Items that improve daily carry experience
Firearm Selection and Optimization
Shield Arms Enhanced Platforms
Glock 43X/48 with S15 System - Ultimate Concealed Carry Platform The combination of Glock 43X or 48 with Shield Arms S15 magazines creates the ideal concealed carry foundation:
Capacity Advantage:
- Standard Setup: 15+1 rounds in compact package
- With Extensions: Up to 20+1 rounds available
- Spare Magazines: Additional 15-17 rounds per spare
- Total Capacity: 30+ rounds with one spare magazine
Concealment Optimization:
- Slim Profile: Single-stack width for minimal printing
- Optimal Length: Perfect balance of capacity and concealability
- S15 Integration: 50% more capacity with no size penalty
- Professional Grade: Reliable enough for law enforcement use
- S15 Combo Pack 1: 3 magazines + steel catch
- S15 Combo Pack 4: Complete EDC kit with extensions
- S15 Magwell Combo: Competition-ready setup
Deep Concealment with Grip Chop
Shield Arms Grip Chop Service - Maximum Concealment Option
For users requiring absolute concealment, the Grip Chop service creates the ultimate deep concealment pistol:
Concealment Advantages:
- Glock 43 Length: Shortened grip eliminates printing
- Professional Environments: Suitable for business attire
- S10 Magazine System: 10-round flush-fit magazines
- S15 Compatibility: 15-round capacity with grip sleeves when needed
Dual Magazine Strategy:
- Primary Carry: S10 magazines for maximum concealment
- Backup/Spare: S15 with grip sleeves for higher capacity
- Situational Flexibility: Switch between concealment and capacity priorities
- Complete System: S10 Grip Chop with accessories
Ammunition Selection Strategy
Defensive Ammunition Criteria:
- Reliable Expansion: Consistent expansion across velocity ranges
- Adequate Penetration: 12-18 inches in ballistic gelatin
- Feeding Reliability: 100% function rate in your specific pistol
- Quality Control: Consistent performance from major manufacturers
Recommended Defensive Loads:
- Federal HST 124gr: Excellent expansion and penetration
- Speer Gold Dot 124gr: Proven law enforcement choice
- Winchester PDX1 124gr: Good feeding characteristics
- Hornady Critical Duty 135gr: Designed for barrier penetration
Holster Systems and Carry Methods
Shield Arms Holster Integration
Inside-the-Waistband (IWB) Systems:
- Kydex Construction: Durable, consistent retention
- S15 Compatibility: Accommodates thicker S15 magazines
- Adjustable Retention: Customizable to user preference
- Comfort Features: Sweat guards and rounded edges
Outside-the-Waistband (OWB) Systems:
- Open Carry: Professional and recreational applications
- Competition Ready: USPSA/IDPA legal configurations
- Duty Use: Law enforcement suitable retention systems
- Range Training: Optimal for training and practice
Carry Position Analysis
Appendix Inside-the-Waistband (AIWB) - Most Popular Choice
- Advantages: Fast draw, good retention, works seated
- Disadvantages: Requires quality holster, not for everyone
- Best For: Active lifestyle, driving, office work
- Holster Requirements: Rigid kydex, good trigger coverage
Strong Side Hip (3-4 O'Clock)
- Advantages: Traditional, comfortable, proven
- Disadvantages: Slower draw, retention concerns
- Best For: Open carry, larger body types
- Holster Requirements: Level I or II retention for OWB
Concealed Carry Considerations:
- Clothing Compatibility: Holster must work with typical wardrobe
- Activity Level: Consider movement and physical activity
- Body Type: Choose position that works with your physique
- Training Requirements: Practice with chosen carry method
Medical Equipment Integration
Trauma Care Priorities: The most likely medical emergency in an armed encounter is treating gunshot wounds - your own or others. Your medical kit should prioritize trauma care over basic first aid.
Essential Trauma Supplies:
QuikClot Products:
- QuikClot Combat Gauze: Hemostatic agent for severe bleeding
- QuikClot Trauma Pad: Large coverage hemostatic dressing
- Application: Direct pressure on arterial bleeding
- Effectiveness: Proven in military and civilian trauma care
MyMedic Kits:
- Trauma-Focused: Designed for gunshot wound treatment
- Compact Design: EDC-suitable packaging
- Quality Components: Professional-grade medical supplies
- Training Included: Instructions for proper use
Basic Trauma Kit Components:
- Pressure Bandages: Control bleeding from wounds
- Hemostatic Agents: QuikClot or similar products
- Tourniquets: Stop arterial bleeding in extremities
- Chest Seals: Treat sucking chest wounds
- Gloves: Protect against bloodborne pathogens
Medical Kit Placement Strategy
On-Body Carry:
- Pocket Kits: Small trauma kit in cargo or jacket pocket
- Belt Pouches: IFAK (Individual First Aid Kit) on belt
- Ankle Kits: Backup medical supplies on ankle
- Vehicle Kits: Larger trauma kit in vehicle
Accessibility Considerations:
- One-Handed Operation: Must be usable if one hand injured
- Weak Hand Access: Consider accessing with non-dominant hand
- Stress Testing: Practice under stress and time pressure
- Training Requirements: Medical training as important as medical gear
Tool Selection and Integration
Cutting Tools
Primary Knife Selection:
- Blade Length: 3-4 inches optimal for EDC utility
- Lock Strength: Reliable lock for safety under load
- Steel Quality: Holds edge for daily tasks
- Carry Method: Pocket clip or belt sheath
Multi-Tool Considerations:
- Primary Tools: Pliers, knife, screwdrivers most useful
- Quality Build: Reliable mechanism and materials
- Size/Weight: Balance capability with carry comfort
- Brand Reputation: Leatherman, Gerber, SOG proven choices
Illumination Systems
EDC Flashlight Requirements:
- Output: 300-1000 lumens for versatility
- Runtime: 2+ hours on high setting
- Durability: Impact and water resistant
- Size: Pocket-friendly dimensions
Weapon-Mounted Lights:
- Home Defense: Essential for positive target identification
- Training: Practice with light techniques
- Holster Compatibility: Light-bearing holsters required
- Battery Life: Consider activation frequency
Communication and Documentation
Smartphone Integration:
- Emergency Contacts: ICE (In Case of Emergency) entries
- Medical Information: Allergies, medications, conditions
- Legal Contacts: Attorney contact information
- Insurance Information: Carry insurance policy details
Physical Documentation:
- Concealed Carry Permit: Required in most jurisdictions
- Driver's License: Primary identification
- Medical Alert Cards: Critical medical information
- Emergency Contact Cards: Backup to phone information
Complete EDC System Examples
Professional/Office EDC Setup
Firearm Configuration:
- Platform: Glock 43X with S15 magazines
- Primary Magazine: S15 (15 rounds) or S10 Grip Chop (10 rounds)
- Spare Magazine: Matching capacity magazine
- Holster: AIWB holster with minimal printing
Supporting Gear:
- Medical: Compact trauma kit in briefcase or vehicle
- Tools: Quality folding knife, small flashlight
- Communication: Smartphone with emergency apps
- Professional Appearance: Gear selection maintains business appropriate appearance
- Grip Chop Service for maximum concealment
- S10 magazines for daily carry
- S15 magazines with sleeves for higher-threat situations
Active Lifestyle EDC Setup
Firearm Configuration:
- Platform: Glock 48 with S15 system
- Capacity: S15 Combo Pack 4 for maximum capacity
- Holster: Athletic-compatible holster system
- Accessories: Magazine extensions for range/training use
Activity Integration:
- Exercise: Holster compatible with athletic clothing
- Outdoor Activities: Weather-resistant gear selection
- Travel: TSA-compliant gear organization
- Vehicle: Quick-access vehicle safe integration
Family/Suburban EDC Setup
Firearm Configuration:
- Platform: Glock 43X with standard S15 setup
- Family Considerations: Quick-access home safe for vehicle/home
- Training: Family members trained on basic medical aid
- Legal Compliance: Family education on laws and safety
Enhanced Capabilities:
- Vehicle Kit: Larger medical kit and tools in vehicle
- Home Integration: EDC gear compatible with home defense setup
- Emergency Preparedness: Integration with family emergency plans
- Community: Coordination with neighbors and local resources
Travel EDC Setup
Legal Compliance:
- Reciprocity: Research carry laws for destination states
- Transport: Proper vehicle or airline transport procedures
- Hotel Security: Portable safe for hotel room storage
- Documentation: Permits and legal information organized
Simplified Gear:
- Core Items: Focus on essential items only
- TSA Compliance: Separate firearm and tool transport
- Local Laws: Research destination restrictions
- Emergency Contacts: Local attorney and hospital information
EDC System Integration and Testing
System Compatibility Testing
Physical Integration:
- Comfort Test: Wear complete system for full day
- Movement Test: Perform daily activities with full gear
- Concealment Test: Check printing under various clothing
- Accessibility Test: Practice accessing all gear under stress
Functional Integration:
- Draw Stroke: Practice drawing with medical kit and tools present
- Reload Drills: Practice reloads with full gear setup
- Medical Deployment: Practice deploying medical gear under stress
- Tool Access: Verify access to all tools and equipment
Training Integration
Shooting Skills:
- Basic Marksmanship: Accurate shooting with EDC setup
- Defensive Drills: Shooting from concealment with cover garments
- Malfunction Clearance: Clearing malfunctions with EDC gear present
- Low Light: Shooting with EDC flashlight techniques
Medical Skills:
- Basic Trauma Care: Treating gunshot wounds and severe bleeding
- Equipment Familiarity: Proficiency with specific medical gear
- Stress Inoculation: Medical training under time pressure
- Scenario Training: Realistic medical emergency scenarios
Legal Knowledge:
- Use of Force Laws: Understanding legal requirements
- Aftermath Procedures: Post-incident legal requirements
- Documentation: Proper documentation of incidents
- Legal Contacts: Relationship with qualified attorney
Advanced EDC Considerations
Vehicle Integration
Shield Arms Holster and Storage Solutions:
Quick-Access Vehicle Safes:
- Console Safes: Integrated into vehicle center console
- Seat Safes: Mounted under or behind seats
- Door Panel Safes: Integrated into door panels
- Trunk Storage: Secure storage for additional gear
Extended Gear Storage:
- Range Bags: Additional magazines and training gear
- Medical Kits: Enhanced trauma kits for extended situations
- Tools: Additional tools and emergency equipment
- Communications: Emergency radios and charging equipment
Home Integration
Seamless Transition:
- Home Defense: EDC gear transitions to home defense role
- Storage Systems: Quick-access storage for home use
- Family Access: Family member access to medical supplies
- Emergency Preparedness: Integration with home emergency plans
- Bags and Cases: Organized storage for complete EDC systems
- Belt Systems: Tactical belts for enhanced carry capacity
- Chest Rigs: Load-bearing equipment for emergency situations
- Modular Systems: Scalable gear organization
Seasonal Adaptations
Summer EDC:
- Lighter Clothing: Requires smaller, more concealable gear
- Heat Considerations: Gear selection for hot weather comfort
- Activity Level: Enhanced capability for outdoor activities
- Hydration: Additional consideration for water and electrolytes
Winter EDC:
- Layered Clothing: Holster compatibility with heavy clothing
- Extended Carry: Larger gear capacity in winter clothing
- Weather Resistance: Gear protection from moisture and cold
- Vehicle Dependence: Enhanced vehicle kit capabilities
Legal and Safety Considerations
Permit and Legal Requirements
Concealed Carry Permits:
- Home State: Valid permit for primary residence
- Reciprocity: Understanding of multi-state recognition
- Renewal: Maintaining current permit status
- Compliance: Following all legal requirements
Use of Force Considerations:
- Legal Standards: Understanding justified use of force
- Duty to Retreat: State-specific requirements
- Castle Doctrine: Home and vehicle protection laws
- Good Samaritan: Legal protection for helping others
Insurance and Legal Protection
Self-Defense Insurance:
- Legal Defense: Attorney fees and legal representation
- Civil Protection: Protection against civil lawsuits
- Bail Bond: Coverage for bail and bond requirements
- Training Support: Coverage for training and education
Documentation and Reporting:
- Incident Documentation: Proper documentation procedures
- Law Enforcement: Cooperation with investigation
- Medical Treatment: Documentation of injuries and treatment
- Legal Representation: Immediate access to qualified attorney
Budget Planning and Implementation
Phased Implementation Strategy
Phase 1: Foundation ($800-1,200)
- Firearm: Glock 43X or 48 base platform
- Magazines: S15 Combo Pack 1
- Holster: Quality IWB holster
- Basic Medical: Compact trauma kit
Phase 2: Enhancement ($400-600)
- Additional Magazines: Spare capacity options
- Enhanced Medical: Professional trauma kit
- Tools: Quality knife and flashlight
- Training: Professional instruction and practice
Phase 3: Optimization ($300-500)
- Specialized Gear: Grip chop service or extensions
- Vehicle Integration: Vehicle safe and extended kits
- Advanced Training: Specialized courses and certifications
- Legal Protection: Self-defense insurance coverage
Cost-Effective Purchasing
Shield Arms Package Deals:
- S15 Combo Packages: 10-15% savings vs individual items
- Complete Systems: Integrated packages with compatibility guaranteed
- Bulk Pricing: Multiple magazine discounts
- Professional Packages: Law enforcement and military pricing
Long-Term Value:
- Quality Investment: Buy-once, cry-once philosophy
- Warranty Coverage: Shield Arms lifetime warranty protection
- Upgrade Path: Compatible components for future expansion
- Resale Value: Quality gear maintains value over time
Maintenance and Sustainment
Regular Maintenance Schedule
Daily Maintenance:
- Function Check: Verify all gear present and functional
- Condition Check: Inspect for damage or wear
- Battery Check: Verify flashlight and electronic device charge
- Accessibility: Ensure all gear properly positioned
Weekly Maintenance:
- Deep Inspection: Thorough examination of all gear
- Cleaning: Clean and maintain firearms and tools
- Inventory: Verify all consumables and supplies
- Training: Practice with EDC gear and skills
Monthly Maintenance:
- Gear Rotation: Rotate consumables and batteries
- Training Evaluation: Assess skill levels and training needs
- Legal Updates: Check for changes in laws and regulations
- Insurance Review: Verify coverage and update information
Continuous Improvement
Performance Evaluation:
- Comfort Assessment: Daily carry comfort and issues
- Functionality Testing: Regular testing of all systems
- Training Progress: Skill development and proficiency
- Gear Evolution: Upgrade and improvement opportunities
Community Integration:
- Training Groups: Local training and practice groups
- Information Sharing: Stay current on best practices
- Legal Updates: Community awareness of law changes
- Emergency Coordination: Community emergency response planning
Conclusion: Your Complete EDC System
System Integration Success
Building an effective EDC system requires thoughtful integration of multiple components working together toward common goals of protection, capability, and daily utility. The key principles for success include:
Systematic Approach:
- Threat Assessment: Base gear selection on realistic threat analysis
- Compatibility: Ensure all components work together effectively
- Training Integration: Develop skills with your specific gear configuration
- Legal Compliance: Maintain full compliance with all applicable laws
Quality Foundation:
- Proven Platforms: Build around reliable, proven equipment
- Professional Standards: Choose gear meeting professional requirements
- Warranty Support: Select manufacturers standing behind their products
- Upgrade Path: Choose systems allowing future improvement and expansion
Shield Arms EDC Advantage
Complete System Solutions: Shield Arms provides complete EDC system solutions rather than individual components:
- Firearm Platforms: Optimized Glock 43X/48 systems
- Magazine Systems: S15 and S10 capacity solutions
- Modification Services: Professional customization for specific needs
- Support Gear: Holsters, medical, and accessories
- Complete Packages: Integrated solutions with compatibility guaranteed
Professional Support:
- Engineering Excellence: Products designed by professionals for professionals
- Customer Service: Technical support for system integration
- Training Resources: Educational content for skill development
- Warranty Coverage: Lifetime protection for quality assurance
Getting Started
Assessment Phase:
- Threat Analysis: Evaluate your specific threat environment
- Legal Research: Understand applicable laws and requirements
- Lifestyle Analysis: Consider daily activities and requirements
- Budget Planning: Develop phased implementation strategy
Implementation Phase:
- Foundation Build: Start with proven firearm and holster system
- Training Investment: Develop skills with chosen equipment
- System Integration: Add components systematically
- Testing and Refinement: Continuously improve and optimize
Recommended Starting Point:
- S15 Complete System: Proven foundation for any EDC build
- Professional Consultation: Technical support for system planning
- Training Resources: Educational content for system optimization
Your EDC system is a personal life insurance policy - invest in quality components, professional training, and systematic integration for maximum effectiveness when it matters most.
Ready to build your complete EDC system? Explore Shield Arms complete packages or contact our team for personalized system recommendations based on your specific needs and threat environment.
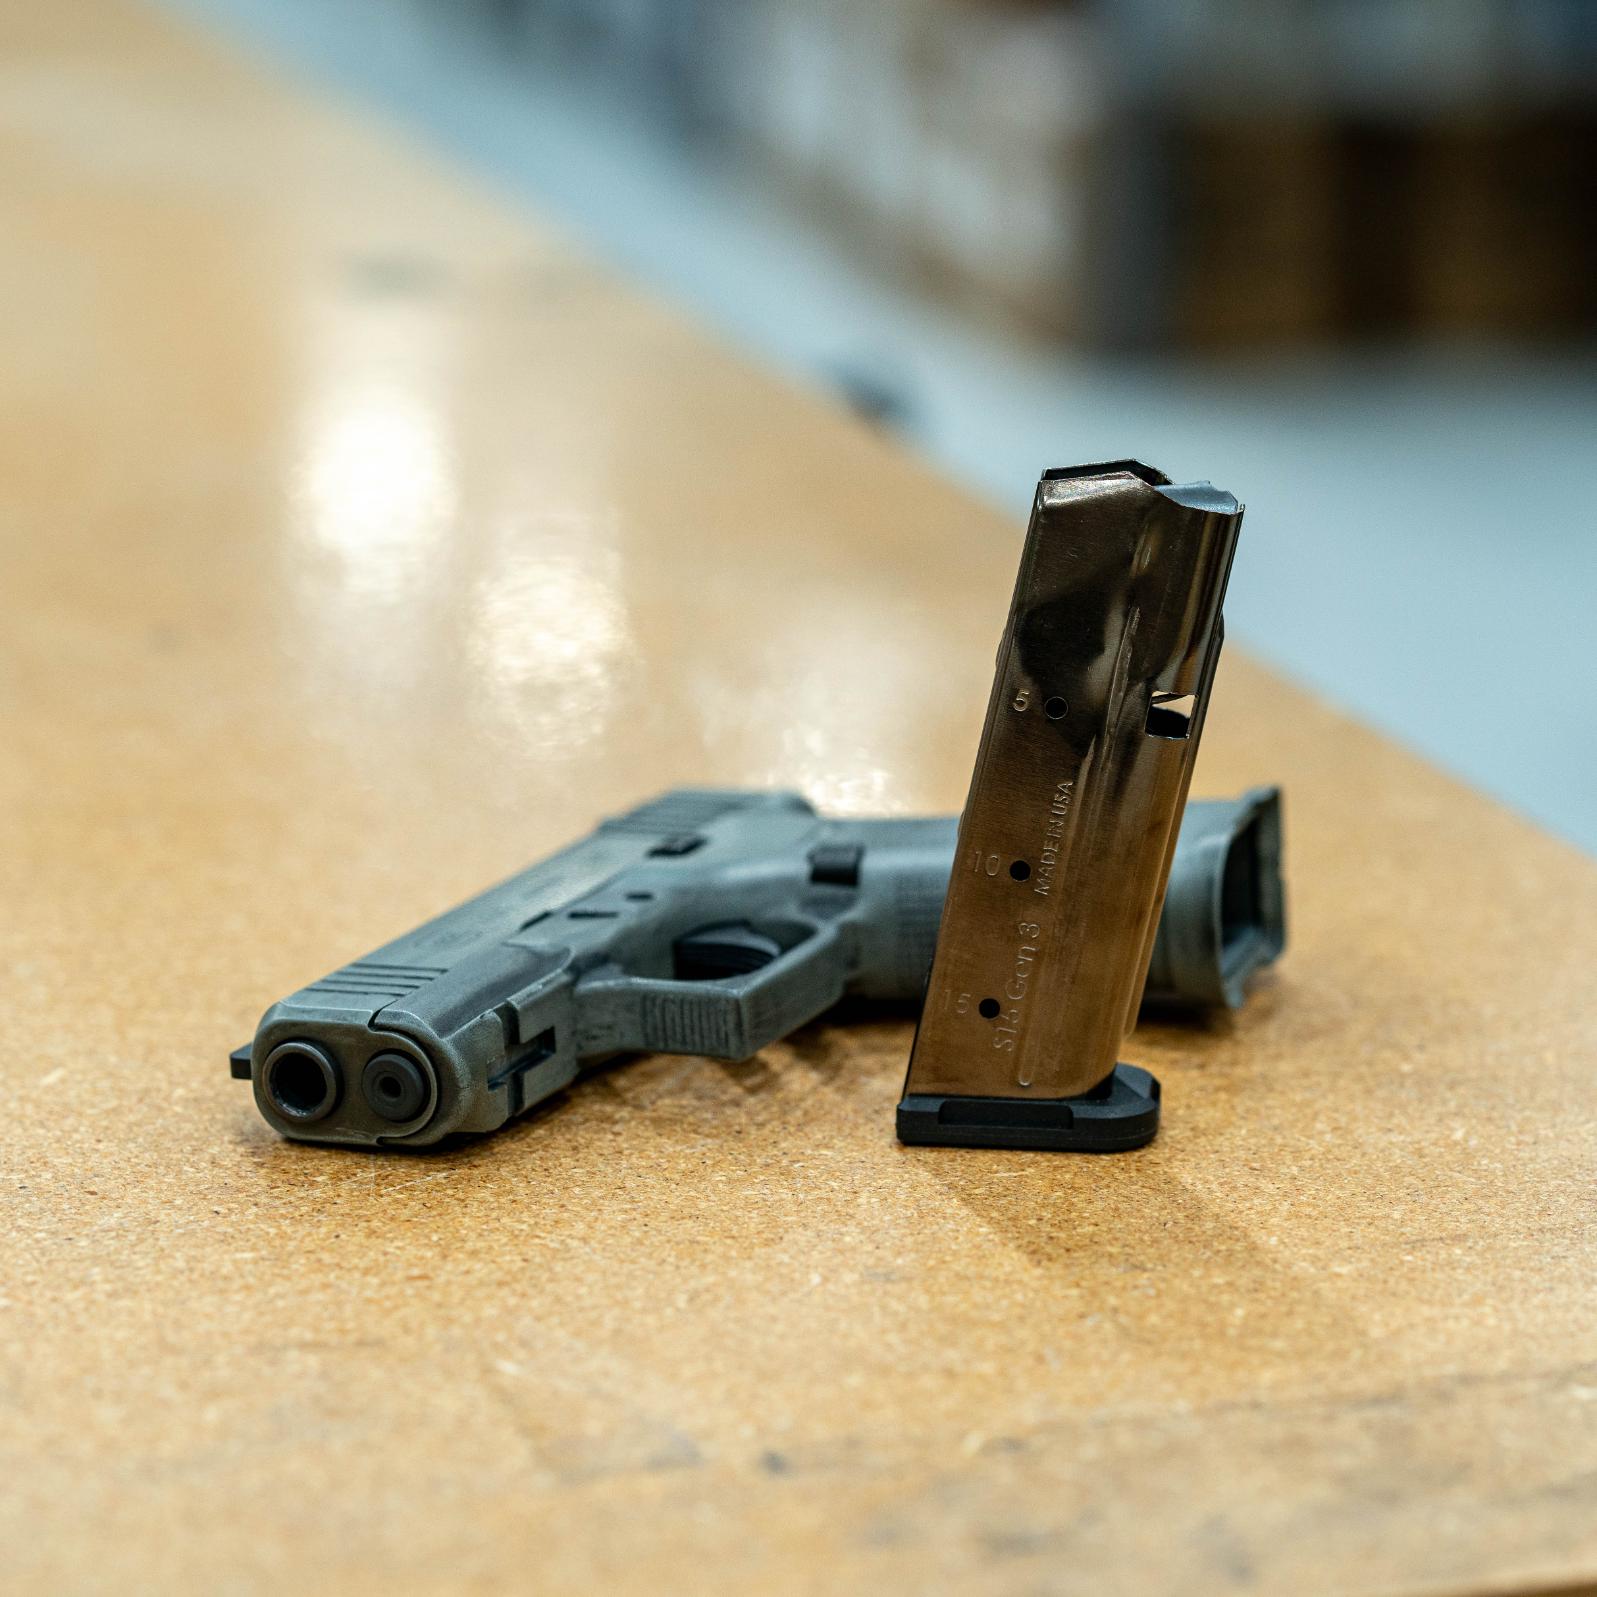
S15 Magazine Complete Installation Guide
S15 Magazine Complete Installation Guide for Glock 43X/48
Transform your Glock 43X or 48 from 10 rounds to 15 rounds with the same overall footprint
The Shield Arms S15 magazine is a game-changer for Glock 43X and 48 owners, offering a 50% capacity increase without extending the magazine length. This patented steel magazine holds 15 rounds compared to the factory 10-round capacity, giving you significant firepower advantages for concealed carry, home defense, or range training.
Important Note: S15 magazines requires replacing your factory plastic magazine catch with a steel version. This guide covers the complete installation process to ensure reliable function.
Video Installation Tutorial
Watch our complete S15 installation process before starting your installation:
Video Highlights:
- ✅ Complete installation process from start to finish
- ✅ Common mistakes demonstrated and avoided
- ✅ Proper tool usage and safety procedures
- ✅ Testing and break-in recommendations
Prefer to read the instructions? Continue with the detailed written guide below.
What You'll Need (Tools and Parts)
Required Tools
- 3/32" punch (or similar small punch)
- Small hammer (plastic or brass preferred)
- Needle-nose pliers
- Gun vise or padded surface for stability
- Safety glasses (metal parts can spring out)
- Good lighting for small component work
Required Parts
- Shield Arms S15 Magazine (Gen 3 recommended)
- Shield Arms Steel Magazine Catch (Standard or Premium)
- Factory Glock 43X/48 (unloaded and verified safe)
Optional but Recommended
- Gun mat or towel to prevent scratches
- Small container for holding removed parts
- Camera or phone to document disassembly steps
Step 1: Safety First - Unload and Verify
Critical Safety Steps:
- Point firearm in safe direction at all times
- Remove magazine from pistol
- Lock slide open and visually inspect chamber
- Insert finger into ejection port to physically verify empty chamber
- Let slide close and dry fire in safe direction (if comfortable doing so)
- Remove any ammunition from work area
Pro Tip: Even experienced shooters should follow these steps every time. Complacency with firearm safety can have tragic consequences.
Step 2: Remove Factory Magazine Catch
Locate the Magazine Catch Components
The magazine catch system consists of three parts:
- Magazine catch button (visible on left side of frame)
- Magazine catch spring (inside frame)
- Magazine catch body (extends through frame to catch magazines)
Disassembly Process
2.1 Position the Pistol
- Place Glock in gun vise or on padded surface
- Ensure muzzle points in safe direction
- Have good lighting on work area
2.2 Compress the Magazine Catch Spring
- Look through magazine well from bottom
- Locate the magazine catch spring (small coil spring)
- Using needle-nose pliers, gently compress the spring upward
- This relieves tension on the magazine catch components
2.3 Remove Magazine Catch Button
- While maintaining spring compression, push magazine catch button from left side
- The button should slide out toward the right side of frame
- Catch the button - it can spring out with force
- Set button aside in small container
2.4 Remove Spring and Catch Body
- Release spring compression and remove spring from frame
- The magazine catch body will now slide out through the magazine well
- Note the orientation of all parts for reassembly
Common Mistake: Rushing this step and losing small parts. Take your time and keep track of component orientation.
Step 3: Install Steel Magazine Catch
Why Steel is Required
The factory plastic magazine catch is designed for Glock's polymer magazines. The S15's steel construction and different geometry require a steel magazine catch for:
- Proper magazine retention
- Reliable magazine release
- Prevention of magazine binding
- Long-term durability
Installation Process
3.1 Prepare Steel Magazine Catch
- Remove steel magazine catch from packaging
- Inspect for shipping damage or defects
- Note that steel catch may have different texture/finish than plastic OEM
3.2 Install Magazine Catch Body
- Insert steel magazine catch body through magazine well
- Ensure proper orientation (catch faces toward trigger guard)
- Body should slide through frame easily without force
3.3 Install Spring
- Position magazine catch spring over catch body
- Spring should sit in designated groove on catch body
- Ensure spring is not twisted or bound
3.4 Install Magazine Catch Button
- Compress spring using needle-nose pliers
- Insert steel magazine catch button from right side of frame
- Button should slide through frame and engage with catch body
- Release spring compression gradually
3.5 Test Magazine Catch Function
- Press magazine catch button - it should move smoothly
- Release button - it should return to flush position
- There should be no binding or sticking
Step 4: Test Magazine Function
Initial Function Check
4.1 Insert Empty S15 Magazine
- Insert S15 magazine into magazine well
- Magazine should slide in smoothly without resistance
- You should hear/feel a distinct "click" when magazine locks in place
- Tug on magazine - it should be securely retained
4.2 Test Magazine Release
- Press magazine catch button firmly
- Magazine should drop free immediately
- If magazine doesn't drop free, see troubleshooting section below
4.3 Repeat Test Multiple Times
- Perform insertion/release cycle 5-10 times
- Ensure consistent, reliable function
- Magazine should lock and release identically each time
OEM Magazine Compatibility Note
Important: After installing steel magazine catch, your factory Glock magazines may:
- Not drop free when button is pressed
- Require manual extraction from magazine well
- Show increased wear on magazine body over time
This is normal and expected. The steel catch is optimized for S15 magazines. We recommend using steel magazines with steel catch and plastic magazines with plastic catch for optimal performance.
Step 5: Load and Test S15 Magazine
Breaking In Your S15 Magazine
5.1 Initial Loading
- Start with 10 rounds for first loading
- Use quality ammunition (avoid steel case for break-in)
- Load rounds slowly - new magazine springs are stiff
- Don't force rounds if resistance is encountered
5.2 Gradual Capacity Increase
- First range session: Load 10-12 rounds
- Second session: Load 13-14 rounds
- Third session: Load full 15 rounds
- This gradual approach helps spring settle properly
5.3 Break-In Period Expectations
- First 100-200 rounds: Magazine may feel stiff
- Loading resistance: Normal for new steel magazines
- Minor feeding hesitation: May occur during break-in
- Performance improvement: Should be noticeable after break-in
Live Fire Testing
Range Testing Protocol:
- Start with 10 rounds loaded in S15 magazine
- Fire slowly - allow magazine to function properly
- Check for feeding issues or malfunctions
- Gradually increase rate of fire as confidence builds
- Test with different ammunition types if desired
What to Expect:
- Reliable feeding
- Consistent ejection patterns
- No increase in malfunctions compared to OEM magazines
- Identical shooting experience with 50% more capacity
Common Installation Mistakes to Avoid
Magazine Catch Installation Errors
Using Wrong Orientation
- Magazine catch body has specific orientation
- Catch must face toward trigger guard
- Reversed installation prevents proper magazine retention
Insufficient Spring Compression
- Spring must be fully compressed during assembly
- Partial compression can cause binding
- Use proper tools - don't force components
Cross-Threading or Binding
- Components should slide together smoothly
- Forcing parts can damage threads or surfaces
- Take apart and restart if resistance is encountered
Testing and Break-In Mistakes
Skipping Empty Magazine Testing
- Always test magazine insertion/release before loading
- Problems are easier to diagnose with empty magazines
- Loaded magazine malfunctions can be dangerous
Loading to Full Capacity Immediately
- New magazines need gradual break-in period
- Loading 15 rounds immediately can cause feeding issues
- Gradual loading schedule prevents problems
Using Poor Quality Ammunition
- Steel case ammunition can cause feeding issues during break-in
- Stick to brass case, quality ammunition for initial testing
- Establish reliable function before trying different ammo types
Troubleshooting Installation Issues
S15 Magazine Won't Insert Properly
Possible Causes:
- Magazine catch installed incorrectly
- Magazine catch spring binding
- Debris in magazine well
Solutions:
- Verify magazine catch orientation - catch should face trigger guard
- Check spring position - ensure spring isn't twisted
- Clean magazine well thoroughly before installation
- Test with OEM magazine to verify catch function
Magazine Won't Drop Free
Most Common Cause: Wrong magazine catch installed
- Verify steel catch installation - plastic catch won't work reliably
- Check catch button travel - should move full distance
- Inspect magazine catch engagement - should be clean release
Other Possible Causes:
- Debris in magazine well
- Magazine catch spring binding
- Frame tolerance issues (rare)
Solutions:
- Clean all components thoroughly
- Verify proper part installation
- Contact Shield Arms customer service if problems persist
Magazine Binding or Sticking
Typical Causes:
- New magazine tightness - normal break-in issue
- Inadequate lubrication - rare but possible
- Frame dimension variations - uncommon but possible
Solutions:
- Continue break-in process - most binding resolves with use
- Light lubrication of magazine body sides (sparingly)
- Professional inspection if binding persists after break-in
When to Contact Customer Service
Warranty Coverage
Shield Arms provides:
- 100% lifetime warranty against manufacturing defects
- Spring for Life guarantee - free spring replacement for life
- Technical support for installation and function issues
Contact Shield Arms If:
Installation Problems:
- Components don't fit properly despite following instructions
- Magazine catch won't function correctly after installation
- Parts appear damaged or defective
Function Issues:
- Magazine won't feed reliably after proper break-in period
- Consistent failures to feed or eject
- Magazine body cracking or damage during normal use
Performance Concerns:
- Accuracy issues potentially related to magazine
- Unusual wear patterns on magazine or firearm
- Any safety concerns with magazine function
Contact Information:
- Email: customerservice@shieldarms.com
- Include: Order number, description of issue, photos if helpful
Related Products and Upgrades
Essential Accessories
Premium Magazine Catch
- Enhanced ergonomics for easier operation
- Multiple finish options for custom appearance
- Improved texture for better grip
- Shop Premium Magazine Catch
Additional S15 Magazines
- Carry spares for extended range sessions
- Different generations for specific needs
- Bulk pricing available for multiple magazines
- Shop Additional S15 Magazines
Performance Upgrades
Magazine Extensions
- +2 round extensions for 17-round total capacity
- +5 round extensions for maximum capacity
- Maintains reliability while increasing capacity
- Shop Magazine Extensions
Magazine Wells
- Faster reloads with guided magazine insertion
- Improved ergonomics for competition use
- Multiple finish options available
- Shop Magwells
Complete Setup Packages
Concealed Carry Package
- S15 magazines + steel catch + holster recommendations
- Optimized for daily carry applications
- Tested combinations for reliability
Competition Package
- Maximum capacity magazines + extensions + magazine well
- Optimized for competitive shooting
- Fast reload capabilities
Maintenance and Long-Term Care
Regular Maintenance Schedule
After Each Range Session:
- Disassemble magazines completely
- Clean all components with appropriate solvents
- Inspect for wear or damage
- Lubricate sparingly if needed
Monthly Inspection:
- Check magazine catch function
- Verify proper magazine retention
- Inspect magazine bodies for cracks or damage
- Test drop-free function
Annual Service:
- Deep clean all components
- Inspect springs for fatigue or damage
- Replace springs if needed (covered under warranty)
- Professional inspection if any concerns
Storage Recommendations
Magazine Storage:
- Store magazines empty for spring longevity (optional - modern springs handle constant compression)
- Clean and dry storage environment
- Avoid extreme temperatures
- Periodic function testing for stored magazines
Documentation:
- Keep purchase receipts for warranty service
- Document installation date and round count
- Note any performance changes over time
- Maintain service records
Conclusion
The Shield Arms S15 magazine installation transforms your Glock 43X or 48 into a higher-capacity platform without sacrificing concealability. With proper installation and break-in, you can expect:
- 50% capacity increase (10 to 15 rounds)
- Identical size to factory magazines
- Reliable function matching OEM performance
- Long-term durability with lifetime warranty
Key Success Factors:
- Follow installation steps carefully and completely
- Use proper steel magazine catch - plastic OEM won't work
- Allow proper break-in period for optimal performance
- Maintain magazines according to recommended schedule
The S15 magazine represents a significant advancement in concealed carry capability, giving you more defensive options in the same compact package. Whether for personal protection, competition, or range training, the additional capacity provides tangible advantages.
Ready to upgrade your Glock 43X or 48? Shop S15 Magazines and Steel Magazine Catches to get started with your capacity upgrade today.
Have questions about S15 installation? Join the discussion by contacting our technical support team for personalized assistance.